Table of Contents
If you have an existing aquarium and want to give it a fresh look or create a more natural environment for your aquatic pets, adding sand can be a fantastic option. Sand not only enhances the visual appeal of your tank but also provides numerous benefits for the health and well-being of your aquatic inhabitants.
In this guide, we’ll walk you through the process of adding sand to your existing aquarium in a step-by-step manner, ensuring a smooth and successful transition for your aquatic friends.
Understanding the Need for Sand in Aquarium
Importance of Sand
- Aesthetic Enhancement: One of the primary reasons many aquarium enthusiasts add sand is its aesthetic appeal. The soft, natural appearance of sand creates a visually stunning aquatic landscape, mimicking the look of natural riverbeds or ocean floors. It offers a more lifelike and calming environment for both you and your aquatic pets.
- Natural Behavior Encouragement: For many species of fish and invertebrates, sand is more than just a decoration; it closely resembles their natural habitat. Bottom-dwelling fish, such as corydoras catfish, loaches, and gobies, enjoy sifting through sand to find food particles, exhibiting their natural behaviors in a sand-filled environment.
- Plant Growth Support: If you have live aquatic plants in your aquarium, sand can be an excellent substrate for them to root and thrive. Plants can anchor themselves more effectively in sand compared to gravel, leading to better growth and overall health.
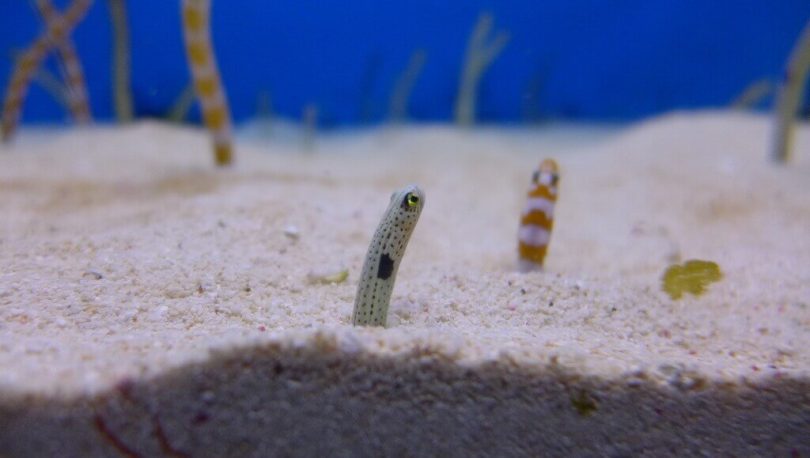
- Beneficial for Burrowing Species: Certain fish and invertebrates, like burrowing shrimp and certain types of eels, require a substrate that allows them to dig and create burrows. Sand is perfect for accommodating their needs, ensuring they feel safe and secure in their environment.
Types of Aquarium Sand
When adding sand to your existing aquarium, you have various options to choose from. It’s essential to select the type of sand that suits your aquarium’s specific needs and the preferences of your aquatic inhabitants.
- Aragonite Sand: Aragonite sand is made from calcium carbonate, and it is an ideal choice for aquariums with marine fish and reef setups. It helps maintain stable pH levels and provides essential trace minerals for corals and other marine organisms.
- Silica Sand: Silica sand is a popular choice for freshwater aquariums. It is affordable and comes in various grain sizes, allowing you to customize the appearance of your tank. However, be cautious when using silica sand in aquariums with burrowing fish, as it may compact over time, making it difficult for them to dig.
- Black Sand: Black sand can be found in both aragonite and silica varieties. It offers a striking and unique look, making the colors of your fish and plants stand out more prominently. Keep in mind that black sand may require more frequent cleaning, as debris tends to be more visible on its dark surface.
- Play Sand: Play sand is a budget-friendly option, commonly used in children’s sandboxes. It’s essential to ensure that the play sand you choose is free from any additives or chemicals. While it may not be as refined as aquarium-specific sand, it can work well for many freshwater setups.
- Colored Sand: If you want to add a pop of color to your aquarium, colored sand is an exciting choice. It comes in various hues, allowing you to create visually stunning underwater landscapes. However, like black sand, colored sand may also require more frequent cleaning.
How do I add sand to an existing aquarium?
Now that we understand the benefits of adding sand and the different types available let’s move on to the step-by-step process of adding sand to your existing aquarium.
Preparation
Step 1: Gather Your Supplies Before you start the process, ensure you have all the necessary supplies. You’ll need the appropriate amount of sand for your aquarium, a bucket for rinsing the sand, a clean container for temporary fish housing, a siphon or aquarium vacuum, and a gentle water conditioner.
Step 2: Clean the New Sand Regardless of the type of sand you choose, it’s crucial to clean it thoroughly before adding it to your aquarium.
Rinse the sand in a bucket or large container until the water runs clear. This step removes any dust, debris, or contaminants from the sand, preventing cloudiness in your tank.
Step 3: Prepare the Aquarium Start by turning off all equipment in your aquarium, such as filters, heaters, and lights. Unplug the equipment and remove any decorations or plants that could get in the way during the sand placement process.
If you have live plants, be gentle while removing them, and keep them submerged in water to prevent them from drying out.
Step 4: Removing the Fish
Before adding the sand, you’ll need to relocate your fish to a temporary tank. Gently scoop them out using a fishnet and place them in the prepared holding tank. This step is vital to ensure the safety of your fish during the sand addition process.
Step 5: Adding the Sand
With the fish safely removed, it’s time to add the clean sand to your aquarium. Start by pouring the sand into the tank, distributing it evenly across the bottom.
Be cautious not to pour the sand too quickly, as it may disturb the tank’s decorations and create a cloudiness in the water.
Step 6: Add a Thin Layer Begin by adding a thin layer of sand to the aquarium. A depth of about 1 inch is sufficient for most setups. Avoid adding too much sand at once, as this may lead to uneven distribution or displacement of decorations.
Step 7: Level the Sand Using your hand or a flat object like a ruler, spread the sand evenly across the bottom of the aquarium. Take your time to ensure the sand is level and uniform, especially if you plan to keep live plants or have burrowing fish.
Step 8: Reintroduce Decorations and Plants Once the sand is evenly spread, you can reintroduce your decorations and live plants. Gently place them back into the aquarium, taking care not to disturb the sand bed.
Step 9: Gradually Add Water Now, it’s time to add water back to the aquarium. To avoid disturbing the sand, place a saucer or small dish on the substrate, directing the incoming water flow onto it. This helps minimize disruption and prevents the sand from clouding the water.
Step 10: Turn Equipment Back On After the aquarium is filled with water, you can turn on your equipment again, such as the filter, heater, and lights. Allow the system to run for a few hours to ensure everything is functioning correctly.
Aftercare and Maintenance
Step 11: Monitoring the Water Quality
After adding the sand, it’s crucial to monitor the water quality regularly. Keep an eye on the ammonia, nitrite, and nitrate levels using a reliable aquarium test kit.
The sand’s addition might slightly affect the water parameters, but with regular monitoring and proper maintenance, any fluctuations can be managed.
Step 12: Reintroducing the Fish
Once the sand has settled, it’s time to reintroduce your fish to their upgraded home. Carefully transfer them back from the temporary tank, using the same acclimation process as you would when introducing new fish to the aquarium. Take your time to let them adjust to their freshly adorned surroundings.
Step 13: Regular Cleaning Like any substrate, sand can accumulate debris over time. Use a siphon or aquarium vacuum to clean the sand during your regular water changes. Be gentle to avoid disturbing the sand bed and the root systems of any live plants you have.
Step 14: Observe and Enjoy Once everything is in place and your aquarium has settled, take a moment to sit back and enjoy the new look.
Watch how your fish and other aquatic inhabitants interact with their enriched environment. Adding sand to your existing aquarium can be a rewarding experience for both you and your aquatic pets.
Common Mistakes to Avoid
- Adding sand with fish in the tank: Never attempt to add sand while the fish are still in the aquarium. The pouring process can cause stress and potential harm to your fish.
- Skipping the cleaning step: Failing to clean the sand thoroughly can lead to cloudy water and affect the water quality in the tank.
- Adding too much sand: Avoid adding an excessive amount of sand, as it can lead to uneven surfaces and may cause issues for your fish.
- Neglecting water quality monitoring: Regularly monitoring the water parameters is crucial, especially after adding sand, to ensure the well-being of your fish.
Remember, the process of adding sand to an existing aquarium requires patience and careful execution. By following these steps and choosing the right type of sand, you can create a stunning and natural environment for your aquatic friends, making your aquarium a captivating centerpiece in your home.