Table of Contents
A cracked aquarium side can be a nightmare for any fish owner, as it can lead to water leaks and potential harm to your aquatic pets. However, before you panic and consider replacing your entire aquarium, it’s important to know that there are steps you can take to fix a cracked aquarium side.
In this article, we’ll guide you through the process of repairing a cracked aquarium side, discussing the tools and materials you’ll need and the steps to take to ensure a safe and effective repair.
Whether you’re a seasoned aquarium owner or new to the hobby, read on to discover how to fix a cracked aquarium side and keep your fish happy and healthy.
Introduction
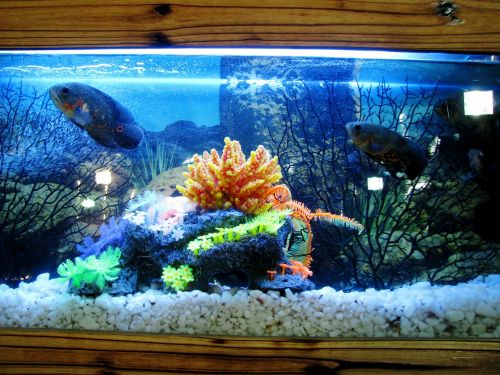
Owning an aquarium brings the wonders of underwater life right into your living space. It’s a magical sight to witness vibrant fish and mesmerizing aquatic plants coexisting harmoniously.
However, over time, due to various reasons such as accidental bumps or poor maintenance, cracks can develop on the aquarium side. A cracked aquarium can be a potential hazard to both your aquatic pets and your living area.
The first step in fixing a cracked aquarium side is to identify the extent of the damage accurately. It’s essential to assess the severity of the crack to determine whether it can be repaired or if a replacement is necessary. Let’s move on to the next section to understand how to identify a crack on your aquarium.
Identifying the Crack
Identifying a crack on your aquarium side is crucial for understanding the severity of the issue. First and foremost, observe the tank closely from all angles and look for any visible signs of damage. A crack may appear as a thin line or a more pronounced gap, depending on its size and location.
Sometimes, hairline cracks may be difficult to spot immediately, so run your fingers gently along the glass to feel for any irregularities.
If you notice any water leakage or dampness around the aquarium base or sides, it’s a clear indication of a crack. Additionally, keep an eye out for bubbles or air pockets forming on the glass, as these can be caused by pressure changes due to the crack.
Identifying the crack at an early stage can help prevent it from worsening and protect your aquatic inhabitants.
Locating the Crack
Once you’ve identified that your aquarium has a crack, the next step is to locate its exact position. Grab a dry cloth and gently wipe the exterior and interior sides of the tank. This will remove any water or condensation, making it easier to spot the crack.
Carefully examine the glass from top to bottom, paying close attention to the corners and edges where cracks are more likely to occur.
Using a small piece of tape or a washable marker, mark the starting and ending points of the crack on the outside of the tank. This will help you keep track of its location during the repair process.
Remember, some cracks might be superficial, affecting only the outer layer, while others can penetrate through the entire glass. Understanding the exact location of the crack is essential for determining the appropriate repair method.
Assessing the Damage
After identifying and locating the crack, it’s time to assess the damage. The severity of the crack will dictate the best course of action. Minor surface cracks that are superficial might not pose an immediate threat and can often be repaired.
On the other hand, deep or extensive cracks that compromise the structural integrity of the tank will likely require a replacement.
One way to assess the extent of the damage is to monitor the crack closely while the aquarium is filled with water. Observe whether the crack expands or leaks under pressure. If the crack remains stable and doesn’t worsen, it may be suitable for repair.
However, if you notice any signs of the crack spreading, it’s best to empty the tank immediately and consider a replacement.
Materials Needed
Before you embark on the journey to fix your cracked aquarium side, gather all the necessary materials. Here’s a list of items you’ll need to ensure a successful repair:
Acrylic or Glass Patch
For minor cracks on glass aquariums, you can use an acrylic or glass patch to seal the damaged area. These patches are readily available in pet stores or online and are specifically designed for aquarium repairs. Make sure to choose a patch that is suitable for the size and type of crack you’re dealing with.
To apply the patch, clean the area around the crack thoroughly and follow the manufacturer’s instructions. Generally, you’ll need to place the patch over the crack and secure it firmly to create a watertight seal.
Silicone Sealant
Silicone sealant is another excellent option for repairing minor cracks and creating a waterproof seal. Ensure you use a high-quality aquarium-safe silicone sealant to avoid any harmful substances from leaching into the water. Apply the silicone along the crack, smoothing it out evenly with a caulking tool or your fingers.
Always let the sealant cure completely before refilling the tank with water to avoid any contamination. Refer to the product instructions for the recommended drying time.
Safety Gear
When repairing an aquarium, it’s essential to prioritize safety. Wear protective gloves and safety goggles to prevent any accidents while handling the glass and repair materials. Additionally, work in a well-ventilated area to avoid inhaling any fumes from adhesives or sealants.
By gathering these materials, you’ll be well-prepared to fix your cracked aquarium side effectively and safely.
Preparing the Aquarium
Before you begin any repair work, it’s crucial to take some necessary precautions to ensure your safety and the well-being of your aquatic friends. Follow these steps to prepare the aquarium for fixing the cracked side:
- Unplug All Electrical Equipment: Start by unplugging all electrical devices, such as heaters, filters, and lights, from the aquarium. This will eliminate any risk of electric shock during the repair process.
- Remove the Water and Fish: Carefully scoop out the water from the aquarium using a clean bucket or a siphon hose. Ensure you keep your fish and other inhabitants in a separate container filled with aquarium water to maintain their comfort and health.
- Inspect the Crack: Before proceeding further, examine the crack’s size and location. If it’s a small crack, it might be relatively easy to fix. However, for larger cracks or ones near the edges, you may need to take additional measures.
Emptying the Aquarium
Now that you’ve prepared the aquarium, it’s time to empty it to have a clear view of the crack and carry out the repair effectively. Follow these steps:
- Find a Suitable Location: Choose a safe and spacious area where you can work comfortably with the aquarium. A sturdy table or a flat surface away from direct sunlight would be ideal.
- Gently Remove Substrate and Decorations: If your aquarium has a substrate (e.g., gravel or sand) and decorations (e.g., plants, rocks), carefully take them out and place them in a separate container. This will prevent any damage to these items during the repair process.
- Empty the Water Completely: Tilt the aquarium slightly to drain any remaining water completely. Be cautious and avoid any sudden movements that might worsen the crack.
Cleaning the Affected Area
Before proceeding with the actual repair, it’s essential to clean the cracked area thoroughly to ensure a strong and reliable fix. Follow these steps:
- Gently Wipe the Area: Use a soft cloth or sponge to wipe the cracked area gently. Remove any algae, debris, or dirt around the crack to ensure proper adhesion of the patch.
- Dry the Area: Allow the cleaned area to dry completely. You can use a dry cloth or let it air dry for a few minutes. Ensuring a dry surface is crucial for the patch to adhere correctly.
- Avoid Harsh Chemicals: Refrain from using any harsh chemicals or household cleaners during this process. They may contain harmful substances that can be harmful to your aquatic life.
Fixing the Crack
Now comes the crucial part – fixing the cracked aquarium side. We’ll guide you through the steps of applying the patch and sealing the crack securely.
Applying the Patch
- Choose the Right Patch: Visit your local aquarium store or a reputable online retailer to find a suitable aquarium repair kit or patch. These patches are usually made explicitly for aquariums, ensuring they are safe for your fish and can withstand water pressure.
- Cut the Patch to Size: Measure the length and width of the crack and cut the patch from the repair kit accordingly. Ensure the patch fully covers the crack with a bit of overlap on all sides.
- Apply Aquarium-Safe Adhesive: Apply a thin layer of aquarium-safe adhesive on the cracked area. Be sure to follow the instructions on the adhesive product for the best results.
- Place the Patch: Carefully place the cut patch over the adhesive-covered area. Press down gently to ensure proper adhesion and removal of any air bubbles. Let it sit for the recommended drying time.
Sealing the Crack
- Use Aquarium-Safe Sealant: To provide extra reinforcement and make the repair watertight, use an aquarium-safe sealant around the edges of the patch. Make sure the sealant you choose is specifically designed for aquarium use.
- Apply the Sealant: Carefully apply the sealant in a neat and even line around the edges of the patch. A steady hand and attention to detail will yield the best results.
- Let It Cure: Allow the sealant to cure as per the manufacturer’s instructions. It’s essential to be patient during this step to ensure a strong bond.
Post-Repair Steps
After noticing a crack on the side of your aquarium, the first step is to assess the severity of the damage. Small hairline cracks may not be as concerning, but larger cracks need immediate attention. Here’s how you can proceed:
- Remove Fish and Plants: Before attempting any repair, carefully transfer your fish, plants, and any other living creatures to a temporary holding tank. Make sure the holding tank is adequately equipped with a filter and heater to maintain a suitable environment for your aquatic friends.
- Drain the Aquarium: Gently drain the water from the cracked aquarium into a bucket or suitable container. Avoid tipping the tank to prevent further damage to the cracked side.
- Clean the Tank: Thoroughly clean the aquarium, both inside and out, using a mild aquarium-safe cleaner. This step is essential to ensure a proper seal during the repair process.
- Assess the Crack: Examine the crack to determine its size and location. If it’s a small crack, you may be able to repair it with a simple DIY fix. However, for larger cracks or those that extend to the seams, it’s best to seek professional help or consider replacing the tank.
- Prepare Repair Materials: If the crack is minor and can be repaired at home, gather the necessary materials, such as an aquarium-safe sealant or epoxy. Choose a product that is specifically designed for aquarium use to ensure the safety of your aquatic inhabitants.
- Apply the Sealant: Carefully apply the sealant to the cracked area following the manufacturer’s instructions. Use a steady hand to create an even and secure seal. Allow the sealant to cure for the recommended time before proceeding to the next step.
- Perform a Leak Test: Before refilling the aquarium, it’s crucial to conduct a leak test to ensure that the repair was successful. Fill the tank with water and let it sit for a few hours. Monitor the tank closely for any signs of leakage. If you notice water seeping from the repaired crack, empty the tank and reapply the sealant.
Checking for Leaks
After completing the repair, it’s essential to check for any potential leaks to prevent any mishaps once the aquarium is fully operational again. Follow these steps to ensure a leak-free aquarium:
- Dry the Tank: Empty the water from the aquarium and thoroughly dry both the inside and outside surfaces. This step will make it easier to detect any leaks.
- Inspect the Repair: Check the area where the crack was repaired for any signs of damage or weakness. Look for bubbles or gaps in the sealant, as they could indicate an incomplete repair.
- Fill the Tank: Slowly refill the aquarium with water, paying close attention to the repaired section. Use a container with a gentle flow to avoid putting excessive pressure on the crack.
- Monitor for Leaks: Once the aquarium is filled, keep a close eye on the repaired area for several hours. Observe the surrounding seams as well, as cracks can sometimes cause stress on neighboring glass panels.
- Addressing Leaks: If you detect any leaks during the test, immediately drain the water and reapply the sealant to the problematic area. Double-check the manufacturer’s instructions to ensure you’re applying the sealant correctly. Repeat the leak test until no leaks are detected.
Refilling the Aquarium
Congratulations! If the leak test was successful, it’s time to get your aquarium up and running again. Here’s how to properly refill your aquarium and reintroduce your aquatic pets:
- Add Conditioner: Before refilling the tank, add an aquarium water conditioner to remove any chlorine and chloramine from tap water. These chemicals can be harmful to your fish and other aquatic life.
- Refill Gradually: Slowly refill the tank with conditioned water to avoid stressing your fish and disturbing the substrate. Pour the water onto a plate or use a water pump to direct the flow gently.
- Reintroduce Fish and Plants: Once the tank is filled to the desired level, acclimate your fish and plants back into their home. Allow the temporary holding tank water to mix with the main tank water for about 15 to 20 minutes before releasing your fish.
- Monitor Water Parameters: Keep a close eye on the water parameters in the following days after the refill. Test the water regularly to ensure it remains stable and suitable for your aquatic inhabitants.
- Resume Regular Maintenance: Now that your aquarium is back to normal, resume your regular maintenance routine. Perform regular water changes, clean the tank as needed, and ensure your fish are well-fed and healthy.
Preventive Measures
Nobody likes dealing with a cracked aquarium side, so it’s essential to take preventive measures to minimize the risk of future cracks or damages. Here are two essential preventive steps you can take:
Regular Maintenance
Performing regular maintenance on your aquarium can help identify and address potential issues before they become major problems. Follow these maintenance tips:
- Inspect for Damage: Regularly inspect your aquarium for any signs of wear, stress, or damage to the glass panels, seams, or silicone. Catching early warning signs can prevent cracks from worsening.
- Check Equipment: Ensure all equipment, such as filters, heaters, and lights, are functioning correctly. Faulty equipment can cause fluctuations in water temperature and pressure, leading to potential cracks.
- Clean Properly: Use only aquarium-safe cleaning products and tools to clean your tank. Avoid using abrasive materials that could scratch the glass or damage the silicone seals.
Proper Handling
When moving or handling your aquarium, take extra precautions to protect it from accidental damage:
- Avoid Tapping or Hitting: Never tap or hit the glass walls of your aquarium, as this can create stress points that may lead to cracks later on.
- Lift with Care: When moving the tank, lift it with care and use proper lifting techniques. Enlist the help of others if your aquarium is large and heavy.
- Use a Stand: Always place your aquarium on a sturdy and level stand designed to support its weight. Avoid placing it on uneven surfaces or weak furniture that may lead to pressure points.
Conclusion
Owning an aquarium is a rewarding experience, and with a little know-how, fixing a cracked aquarium side is a manageable task.
By following the steps outlined in this guide and taking preventive measures, you can keep your aquarium in excellent condition and provide a safe and beautiful habitat for your aquatic companions.
Remember to act promptly if you notice any cracks or damage, as early intervention can make all the difference in saving your aquarium and its inhabitants. Happy aquarium-keeping!